选择安装IIS在Windows 2012 VPS之后,您可能需要配置SMTP。 为此,在以管理员用户身份访问VPS上的RDP后,大家可以按照本文的操作配置SMTP服务器。
在Windows 2012上配置SMTP服务器方法
第一步:通过单击左下方的服务器管理器图标来打开服务器管理器

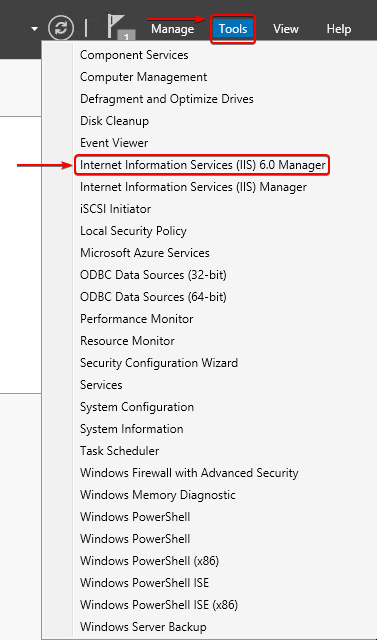
第二步: 单击屏幕右上方的工具,然后从下拉菜单中选择Internet Information Services(IIS)6.0管理器
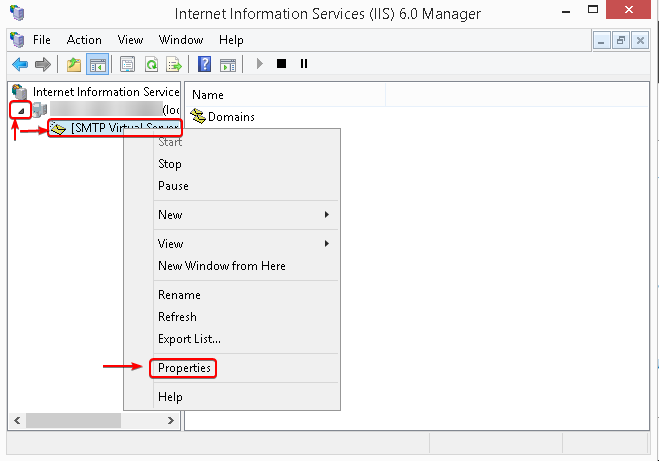
第三步: 单击服务器名称旁边的下拉箭头并右键单击SMTP服务器。 从这里,选择属性。
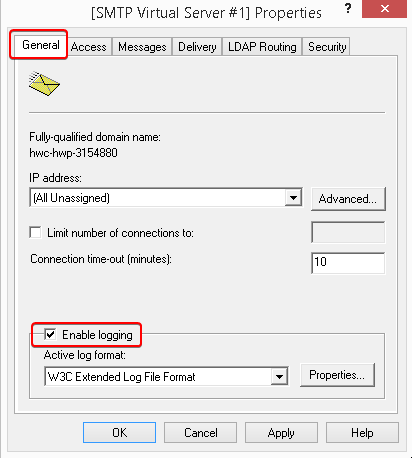
第四步: 如果希望启用SMTP服务器的日志记录,请在”常规”选项卡中,选中”启用日志记录”框。
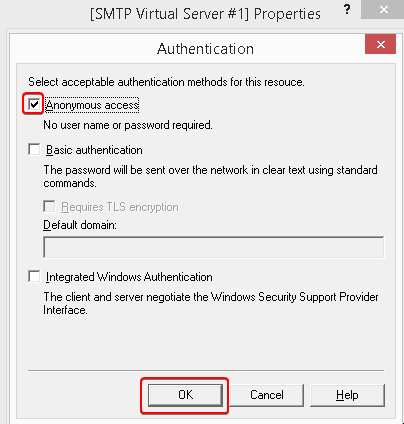
第五步: 在”访问”选项卡上,单击顶部的身份验证的框中

第六步: 确保检查匿名访问,然后单击”确定”继续。
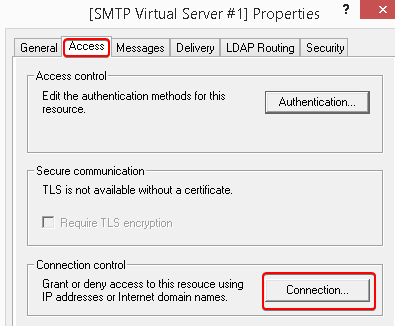
第七步: 当您在”访问”选项卡中输入后,单击”连接”按钮
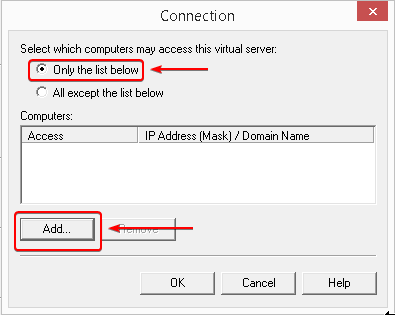
第八步: 只需在下面的列表中查看框,然后单击”添加”按钮。
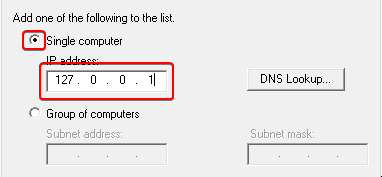
第九步: 选中Single Computer单选按钮,然后输入127.0.0.1,将localhost添加到可以从VPS发送邮件的单计算机列表中,然后单击OK。
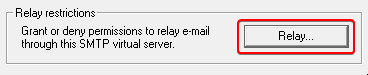
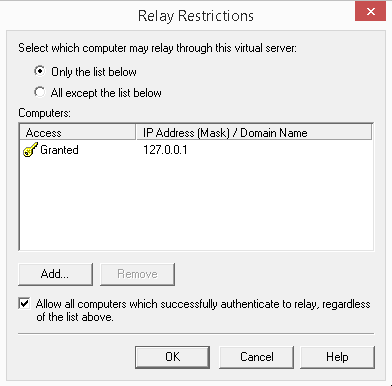
第十步: 一旦回到”访问”选项卡屏幕,请单击”中继”按钮
第十一步: 仅选中下面的列表的单选按钮,然后单击”添加”按钮。 再次,检查单个计算机的单选按钮,然后输入127.0.0.1,然后单击确定。
第十二步: 确认任何其他选项卡中的设置,然后单击”应用”按钮进行这些更改。 单击”确定”退出窗口。