在安装Windows Server 2012时,可能需要扩展操作系统功能,您可能想要的一个常见功能是有能力从Windows实例发送电子邮件,本期为大家带来在Windows Server 2012上安装SMTP教程。
在Windows Server 2012上使用SMTP安装IIS Web服务器
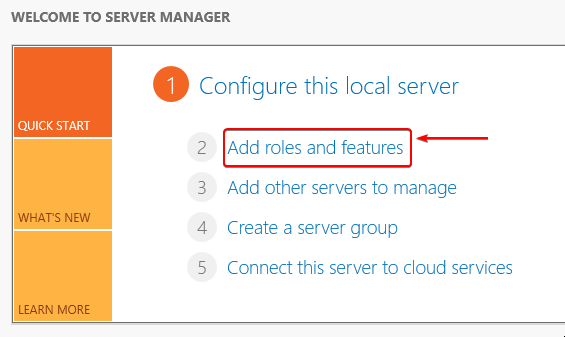
第一步: 单击屏幕左下方的服务器管理器:

第二步: 单击页面中间添加角色和功能。
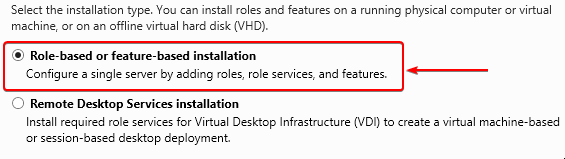
第三步: 单击下一步,直到您看到选择基于角色或基于功能的安装的屏幕,然后单击下一步:
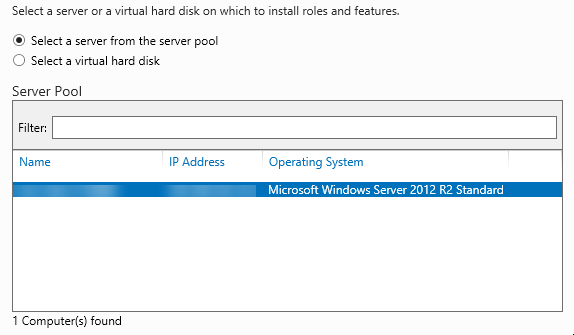
第四步: 确保您的服务器在池中并被选中。 点击下一步
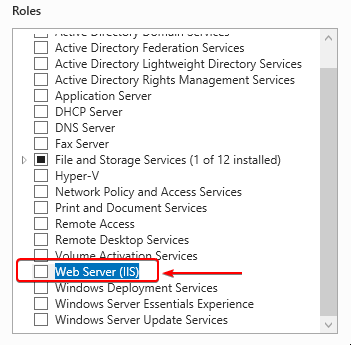
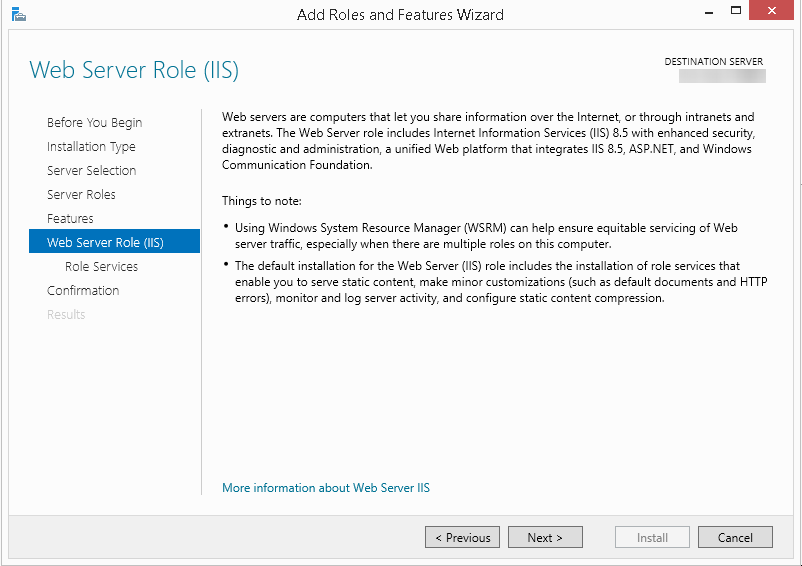
第五步: 选中” Web服务器(IIS)”复选框
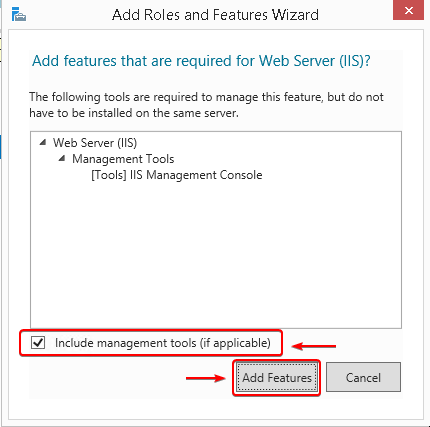
第六步: 将出现弹出框。 确保选中包含管理工具(如果适用)的框并单击”添加功能”按钮
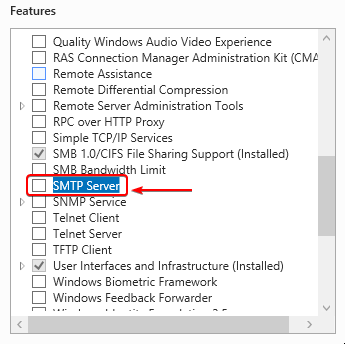
第七步: 通过选中此框,在功能列表中选择SMTP服务器,以使您的SMTP服务器支持电子邮件系统之间的传输或电子邮件。
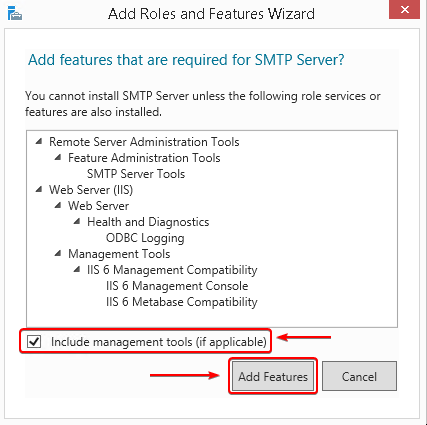
第八步: 确保选中”包含管理工具(如果适用)”复选框,然后单击”添加功能”按钮。 这也将安装其他角色服务或功能。
第九步: 单击”下一步”按钮。
第十步: 查看屏幕上的信息,然后再次按下下一个按钮。
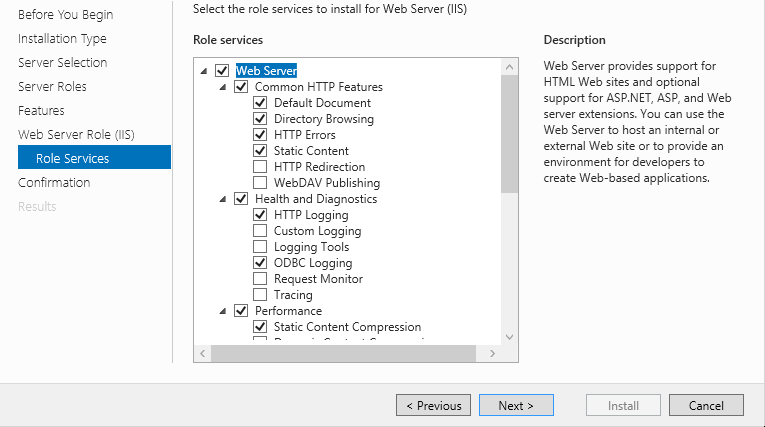
第十一步: 选择要为Web服务器(IIS)安装的角色服务,然后单击”下一步”。
第十二步: 查看安装详细信息,然后单击”安装”按钮开始。
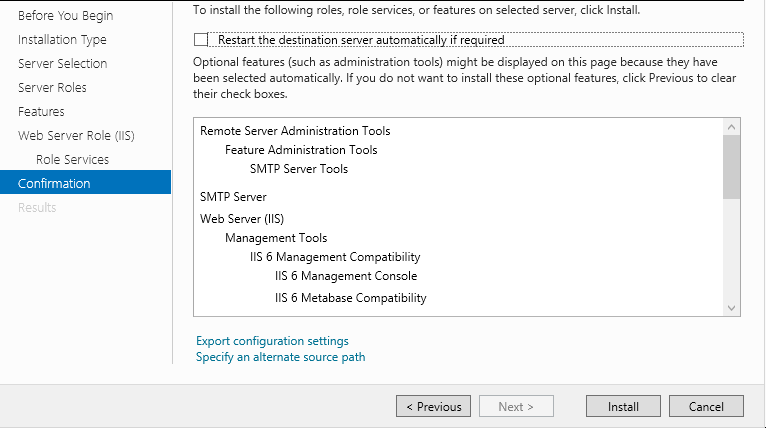
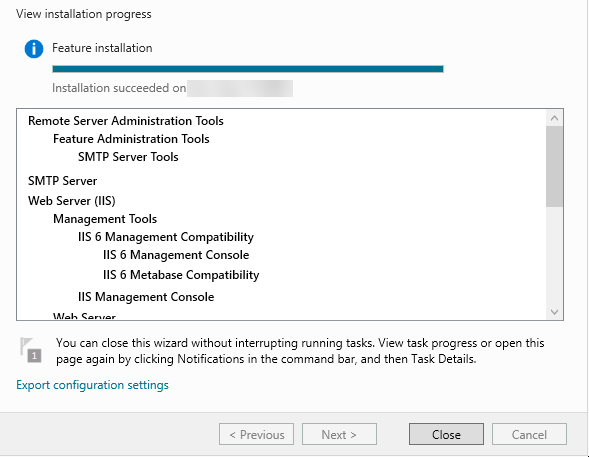
您可以在不中断运行任务的情况下关闭向导,并导出配置设置。 收到安装已完成的消息后,您可以关闭窗口。