Windows的内置FTP不支持安全的FTP,使FileZilla Server成为支持安全FTP的选项。它还提供更简单的用户管理,这些用户管理在服务器应用程序的界面上呈现。虽然它不是IIS FTP角色的更好解决方案,但如果您不使用IIS并使用不提供FTP的Windows的控制面板,则这是一个快速解决方案。
本指南将帮助安装和配置服务器应用程序。
安装Filezilla服务器
第一步。 下载FileZilla服务器 Filezilla站点上的安装程序。
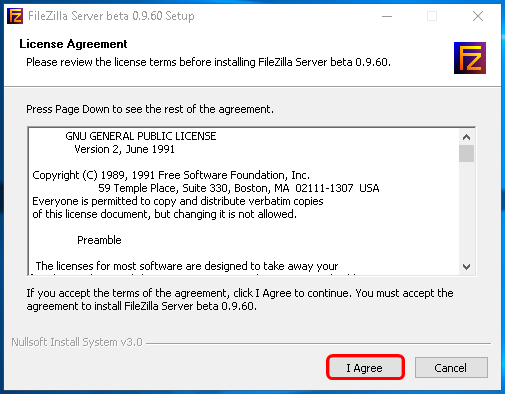
第二步。 运行安装程序以显示安装的许可协议部分。
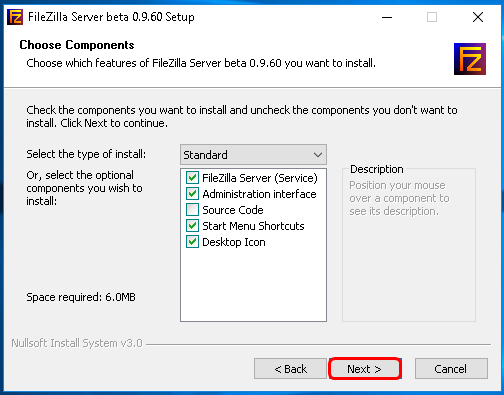
第三步 然后,选择要在安装中包含的复选框。 标准是一个良好的默认值,但是,如果要包含源代码,则可以单击复选框,并将其添加到安装中。
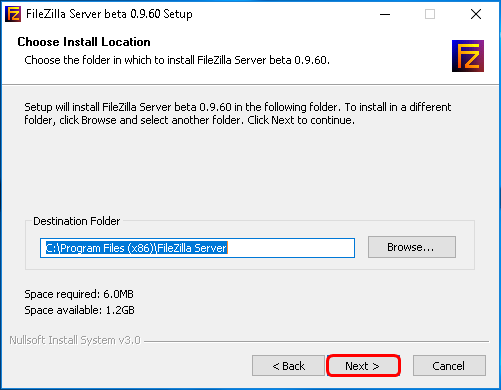
第四步。 接下来,请选择要将其安装到的文件路径,然后单击”下一步”。
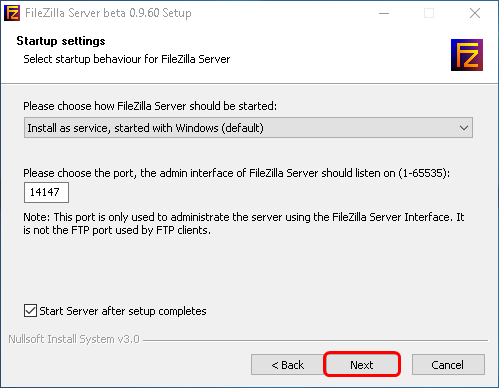
第五步。 接下来,它会询问如何启动FileZilla服务器。 如果您计划经常使用FTP,建议使用默认值。 它还将要求您想要设置的港口。 输入要使用的端口,然后单击”下一步”。

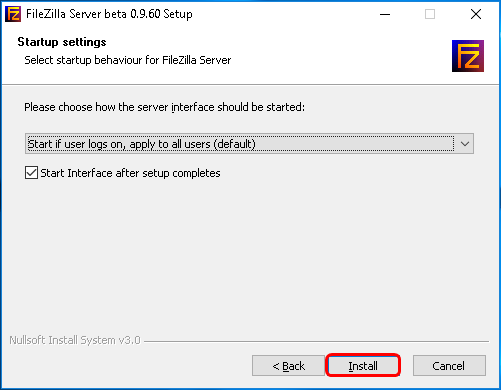
第六步。 接下来,它将询问您是否要启动该帐户(如果用户已登录并适用于所有用户)。 选择所需的结果,然后单击”安装”。
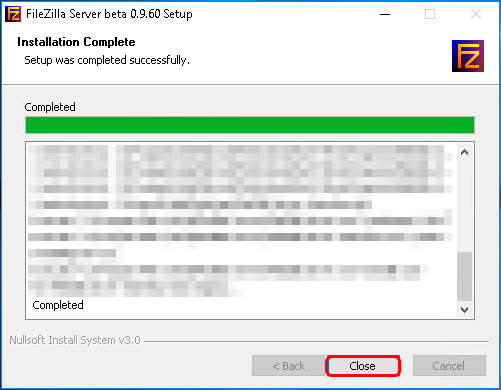
第七步。 最后,它将在安装过程中运行。 完成后,将允许您单击关闭。
现在,您应该在服务器上安装FileZilla Server。 接下来,您需要连接到服务器。
在Windows上连接到Filezilla服务器
您可能需要为FileZilla FTP服务器的配置端口添加例外,以实现与FTP客户端的连接。
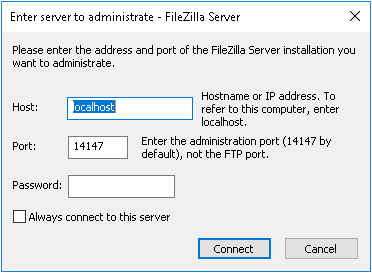
1. 启动FileZilla服务器。
2. 接下来,输入服务器信息。 通常,如果这是安装在单个VPS上,则本文中早期配置的LocalHost和您配置的端口将是您所输入的信息以及您已设置的密码。 然后单击”连接”。
如果您已将用户配置到FileZilla Server应用程序中,则不需要以下步骤。 如果您尚未创建用户和/或组,请按照下一个步骤操作。
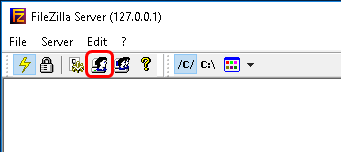
3. 加载客户端后,单击顶部栏上的”用户”图标。
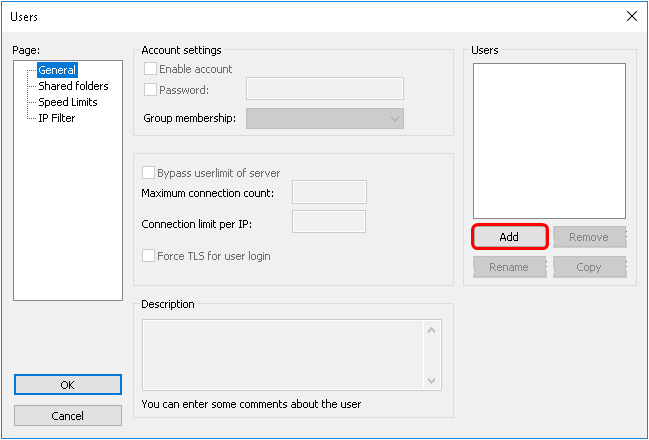
4. 接下来,在首先加载的常规标签上点击添加。
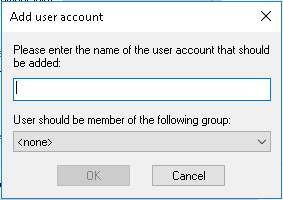
5. 然后,您输入要连接的FTP帐户的所需用户名。 这可以是您认为适合使用的任何用户名。 然后单击”确定”。
6. 接下来,您将单击复选框以启用密码要求并输入密码。
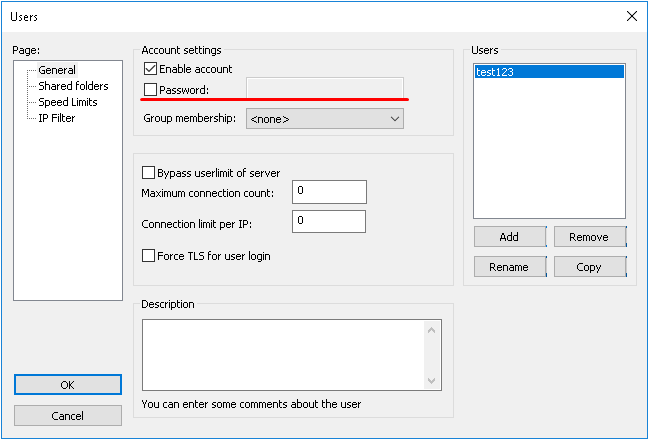
这是可选的。 但是,强烈建议您设置密码以确保用户访问权限。
7. 然后,您将添加要授予用户名访问的目录。 这可以是任何目录。 但是,如果这是一个开发人员,只能选择他们需要访问的目录。
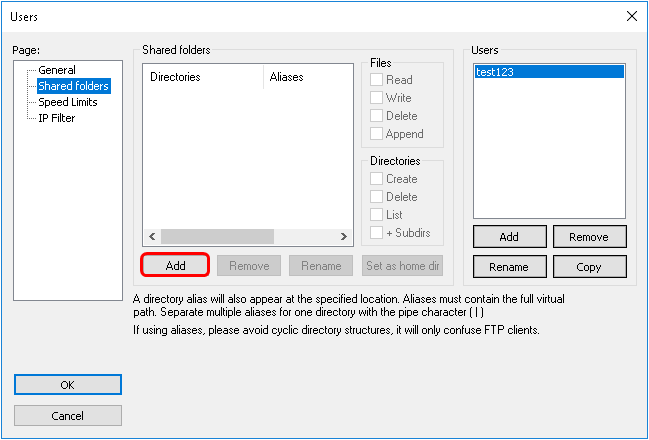
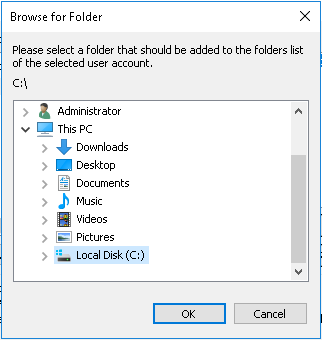
8.选择该目录并通过单击”目录选择”窗口中的”确定”确认。 它应该在它旁边有一个粗体的H. 这表示主目录。 在此区域旁边,通过读取,写入,删除和附加指示权限。 您将根据需要选择。 但是,除非您信任此人,否则建议不要启用删除权限,允许访问这些文件。
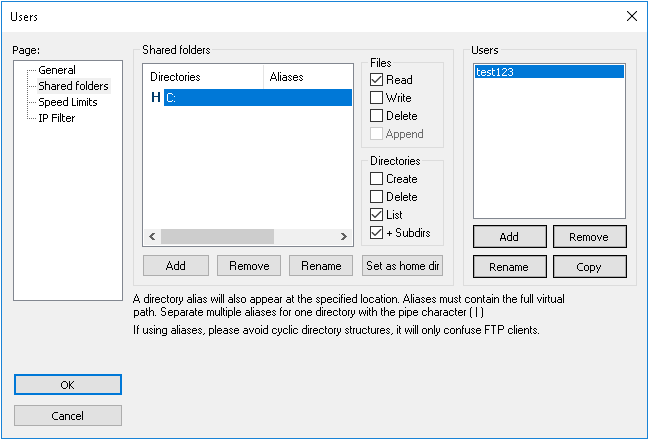
不要将主目录设置为C :! 这将允许用户读取,修改或删除整个驱动器或驱动器的重要文件。 只允许用户配置文件可以访问手头项目所必需的文件。
9. 接下来,单击”确定”,将应用设置。
10. 在桌面客户端上,您将在主机名或IP中输入您在服务器上Filezilla Server应用程序上设置的用户名,密码和您在FileZilla Server应用程序上设置的端口,然后单击”连接”。
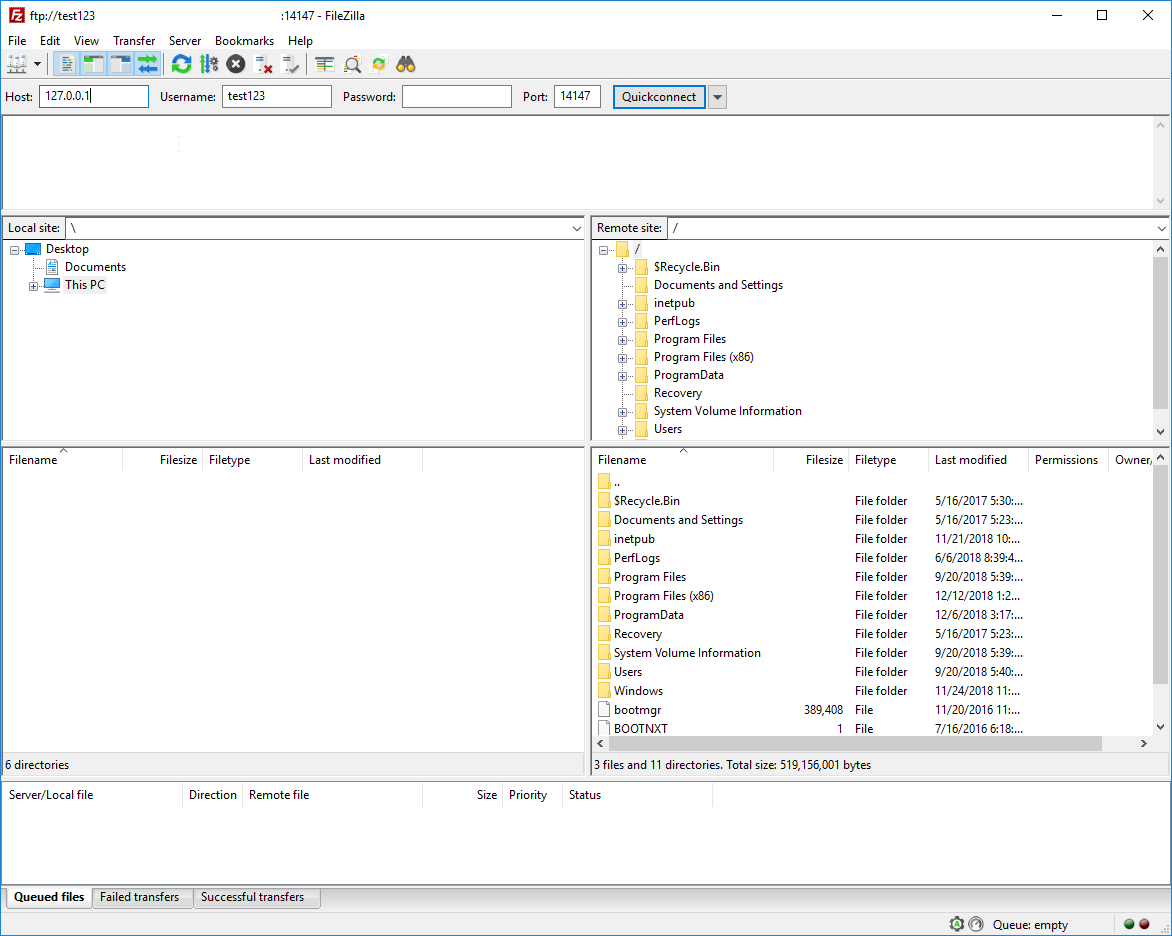
一旦客户端连接,它应该显示用户访问文件夹的内容。